🎉 BOGO Summer Sale: Buy Any Eligible Course, Choose Another FREE!
Your free course will be added to your account within 24 hours. Contact us after purchase to choose your complimentary course.
Member's schedule
Log In
Right-click and open in a new tab to enlarge and print.
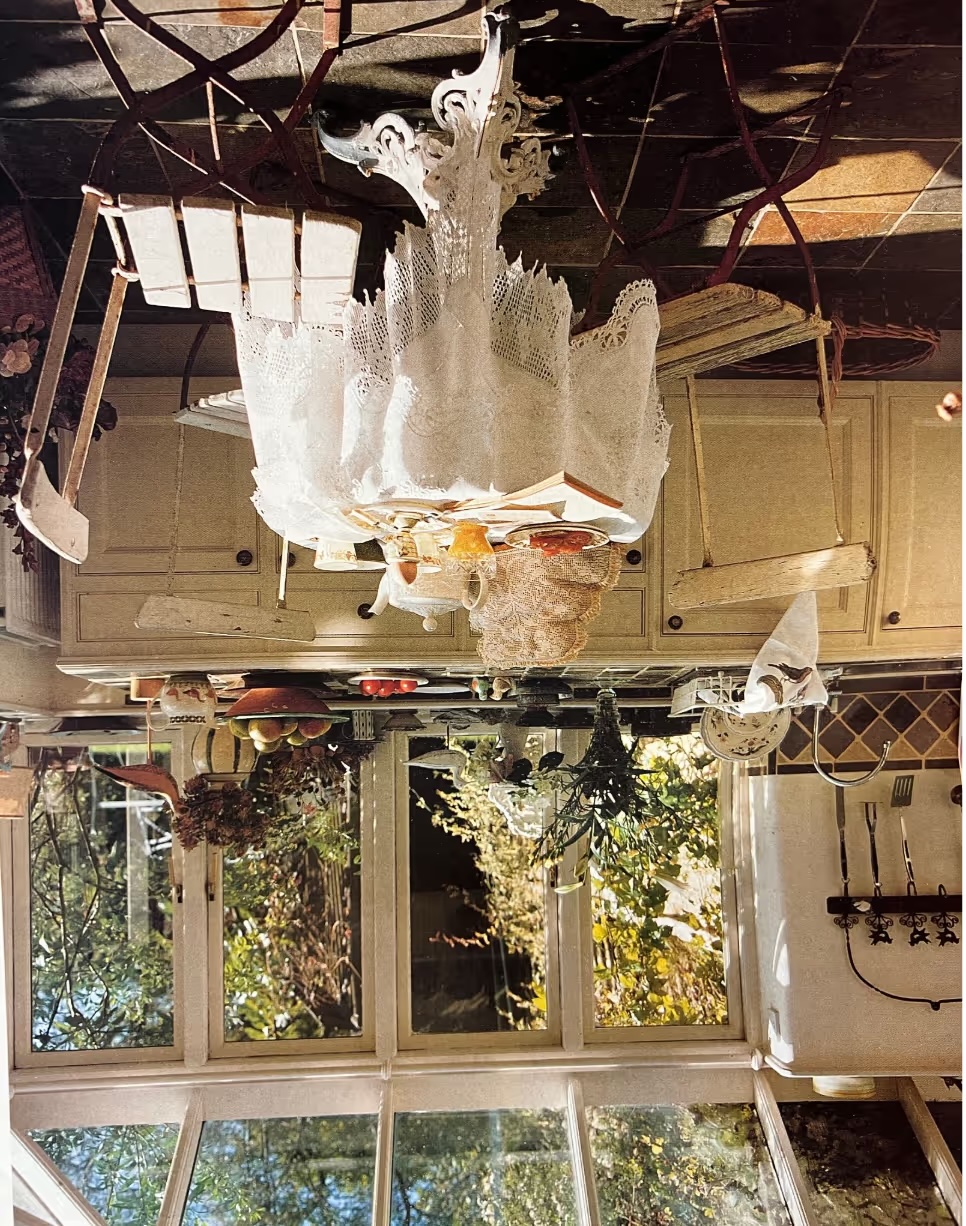
The Right-Brain Technique helps you draw any subject with ease. During the entire process, draw shapes, not things. It may sound counterintuitive, but if you switch to drawing the furniture in the room and all the recognizable details, you’ll lose the magic touch.
Resist the temptation to turn the photograph “to see it”, and resist turning your drawing “to check if your shapes are working”.
The exercise is very easy, but the brain will make it feel challenging - not because the task is hard, but because the brain does not like the uncertainty: in an upside-down drawing, it is impossible to assess quality. The brain craves “confirmation” and “encouragement”. Do not give in to it - it would ruin your focus on shapes! The ego (the conscious brain) should remain in the state of “being unsure” during drawing.
Your attention should be on the concept: “positive and negative shapes as equally important”. Try to get into the state of not-understanding what all these shapes are. Do not turn both your photo and your drawing around even mentally.
Assignment:
If you did not finish your piece from class, continue drawing until you are completely done. Only then can you flip it right-side-up to see it. Read the home assignment for helpful reminders.
If you finished your piece from class early, find an image of an exquisite and complex interior. Turn it upside down, and don’t look at it right-side-up anymore. Keep both the image and your drawing upside down for the entire time. This is a psychological game - to win it, you must follow the rules.
How to start:
If you're using charcoal, soft pastel, or conté crayon, you will need fixative spray. Click here for a natural fixative spray that you can spray inside. Click here for a fixative spray that needs to be used outside. Click here to learn how to spray your artworks.
Want a closer look? Right-click and open in a new tab to view.
